Mirrativ Androidエンジニアのmorizoooです。MirrativではデバッグツールとしてFlipperを使っています。Flipperはモバイルアプリデバッグのためのデスクトップアプリケーションで、アプリ内のデータの整形や可視化を行うことができます。また、Flipperはネットワークの通信状況を確認するNetworkPluginなど、標準でいくつかの機能が用意されています。詳細についてはこちらをご覧ください。 tech.mirrativ.stream
Flipperは標準機能だけでなく、独自のCustomPluginを作成することもできます。MirrativではCustomPluginを積極的に作成し、バグ調査や開発効率の改善に役立てています。一つ例を上げると、Mirrativではコメントやギフトの機能のために、WebSocketベースの独自のPubSubライブラリを使用しています。以前はここでなにか問題が起こったときにペイロードのJSONをLogcatに出力してデバッグしていました。現在ではFlipperのCustomPluginを利用しており、これによりデータの検索、フィルター、閲覧がしやすくなり、バグの原因を特定するスピードが圧倒的に改善しました。
今回の記事では、実装例としてクライアント一覧でJSONを表示するCustomPluginの作成方法についてお話します。
はじめに
FlipperはElectron+Reactで作られており柔軟なカスタマイズが可能です。
Building A Custom Desktop Plugin | Flipper
単純なデータを表示する場合はCreate Table Pluginがテーブル表示、検索がついているので便利です。
https://fbflipper.com/docs/extending/create-table-plugin
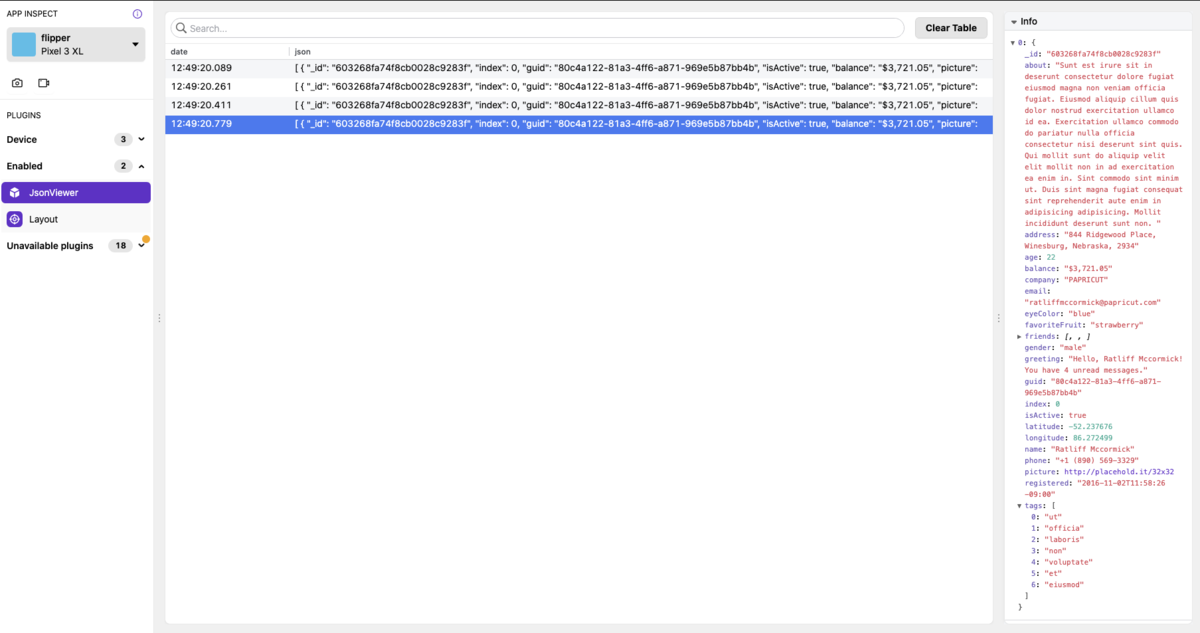
Create Table Pluginを用いて日時とJSONがテーブルで表示され、選択するとサイドバーにJSONの詳細が表示されるプラグインを作成します。
Pluginの開発の流れは以下になります。
- FlipperのDesktopPluginを作成
- Androidで作成したDesktopPluginと接続するためのClientを作成
- AndroidはClientからデータを流す
- FlipperのDesktopPluginでデータが表示されるか確認
まずはAndroidのデータを受けるためのFlipperのDesktopPluginの作成をします。
Desktop Pluginsの作成
flipper-pkgを使用して雛形を作成します。
$ npx flipper-pkg init
# ~/.flipper/config.jsonにpluginのpathが追加される
? You are about to create a plugin in a directory that isn't watched by Flipper. Should we add /github.com/
morizooo/flipper-plugin-table-example to the Flipper search path? (Ctrl^C to abort) Yes
⚙️  Added '/Users/morizooo/dev/src/github.com/morizooo/flipper-plugin-table-example' to the search paths in '/Users/morizooo/.flipper/config.json'
# AndroidのFlipperPluginとFlipperのDesktopPluginをつなぐためのID
? ID (must match native plugin ID, e.g. returned by getId() in Android plugin): json-viewer
# Desktopアプリで表示される名前を設定
? Title (will be shown in the Flipper main sidebar): JsonViewer
⚙️  Initializing Flipper desktop template in /Users/morizooo/dev/src/github.com/morizooo/flipper-plugin-table-example/flipper-plugin-table
Create Table Pluginを使いたいので、package.jsonからflipper-pluginの依存をなくし、
$ npm install
を実行します。
※ flipper-plugin を使うとindex.tsxにComponentとpluginの実装が求められ、createTablePluginを利用することができません。そのため flipper-plugin を依存からはずし代わりに flipper のcreateTablePluginをimportし利用しています。
The following mechanism isn't supported yet by the Sandy plugin architecture. Please remove flipper-plugin from the plugin dependencies if you want to use createTablePlugin.
index.tsxを以下の内容に編集します。
import {Panel, ManagedDataInspector, TableBodyRow, createTablePlugin} from 'flipper';

# idは必須
type Row = {
  id: string
  date: string
  json: string
};

type Events = {
  newRow: Row
};

const columns = {
  date: {
    value: 'date',
  },
  json: {
    value: 'json',
  },
};

# 表示領域の設定
const columnSizes = {
  date: '15%',
  json: 'flex',
};

# 表をタップした時にサイドバーに表示される内容を設定
function renderSidebar(row: Row) {
  return (
    <Panel floating={false} heading={'Info'}>
      <ManagedDataInspector data={JSON.parse(row.json)} expandRoot={true}/>
    </Panel>
  );
}

# 表のデータを設定
function buildRow(row: Row): TableBodyRow {
  return {
    columns: {
      date: {
        value: row.date,
        filterValue: row.date,
      },
      json: {
        value: row.json,
        filterValue: row.json,
      },
    },
    key: row.id,
    copyText: JSON.stringify(row),
    filterValue: `${row.date} ${row.json}`,
  };
}

export default createTablePlugin<Row>({
  method: 'newRow',
  columns,
  columnSizes,
  renderSidebar,
  buildRow,
});
編集後に以下のコマンドを実行しpluginのビルドをします。
$ npm run watch
Android Pluginsの作成
次はFlipperのDesktopPluginにデータを送信するためのAndroidのClientを作成します。FlipperPluginを継承してJsonViewerFlipperPluginを作成します。 getIdのMethodにはnpx flipper-pkg initで指定した値を設定します。
class JsonViewerFlipperPlugin : FlipperPlugin {
    private var connection: FlipperConnection? = null
    private var id = 1

    // npx flipper-pkg initで指定したID
    override fun getId(): String = "json-viewer"

    override fun onConnect(connection: FlipperConnection?) {
        this.connection = connection
    }

    override fun onDisconnect() {
        connection = null
    }

    // flipperを開いていなくてもデータが溜まるようにする
    override fun runInBackground(): Boolean = true

    fun insert(json: String) {
        connection?.send("newRow",
            FlipperObject.Builder()
                .put("id", id) // idは必須。一意の値にする
                .put("date", SimpleDateFormat("HH:mm:ss.SSS", Locale.JAPAN).format(Date()))
                .put("json", json)
                .build())

        id += 1
    }
}
Pluginを作成したらFlipperClientに登録します
class DebugApplication : MyApplication() {
    override fun onCreate() {
        SoLoader.init(applicationContext, false)
        if (BuildConfig.DEBUG && FlipperUtils.shouldEnableFlipper(applicationContext)) {
            val client = AndroidFlipperClient.getInstance(applicationContext).apply {
                addPlugin(InspectorFlipperPlugin(applicationContext, DescriptorMapping.withDefaults()))
                addPlugin(JsonViewerFlipperPlugin())
            }
            client.start()
        }
        super.onCreate()
    }
}
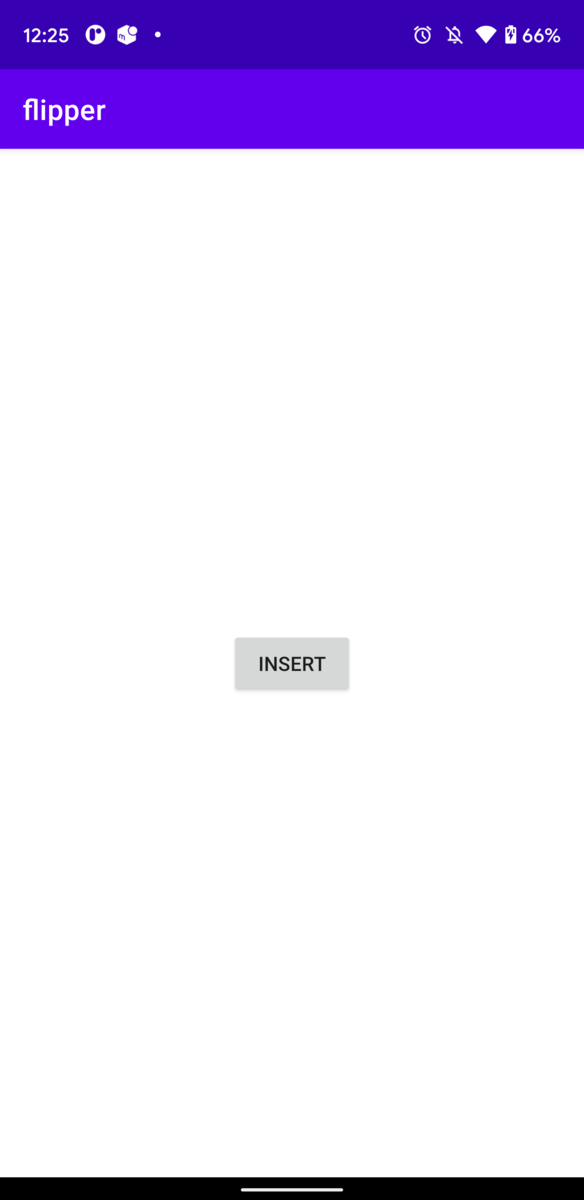
MainActivityから呼び出します
class MainActivity : AppCompatActivity() {
    override fun onCreate(savedInstanceState: Bundle?) {
        super.onCreate(savedInstanceState)
        val binding = ActivityMainBinding.inflate(layoutInflater)
        setContentView(binding.root)

        binding.insertButton.setOnClickListener {
            FlipperManager.tableFlipperPlugin.insert(JSON)
        }
    }

    companion object {
        // https://www.json-generator.com/
        const val JSON = "[\n" +
                "  {\n" +
                "    \"_id\": \"603268fa74f8cb0028c9283f\",\n" +
                "    \"index\": 0,\n" +
                "    \"guid\": \"80c4a122-81a3-4ff6-a871-969e5b87bb4b\",\n" +
                // 省略
                "  }\n" +
                "]"
    }
}
最終的な表示までのデータの詳細な流れは以下になります。
- [Android]
ApplicationのonCreateでFlipperをセットアップし、作成したPluginを登録 - [Android]
MainActivityで作成したPluginのinsertをcallしてデータを流す - [Android] 作成PluginはDesktopPluginとの
connectionを利用してデータをDesktopPluginへ送信(keyはnewRow、dataはJSON) - [Desktop Plugin] DesktopPluginの
createTablePluginはnewRowを受けてJSONのデータを挿入&表示
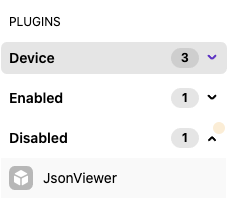
ConsoleからFlipperを起動するとDisabledに追加されるのでEnabledにします。
※ 注意:開発中のプラグインはConsoleから起動しないと反映されません。一覧に存在しない場合は~/.flipper/config.json にPluginのpathが追加されているか確認してください
$ /Applications/Flipper.app/Contents/MacOS/Flipper
Pluginの配布
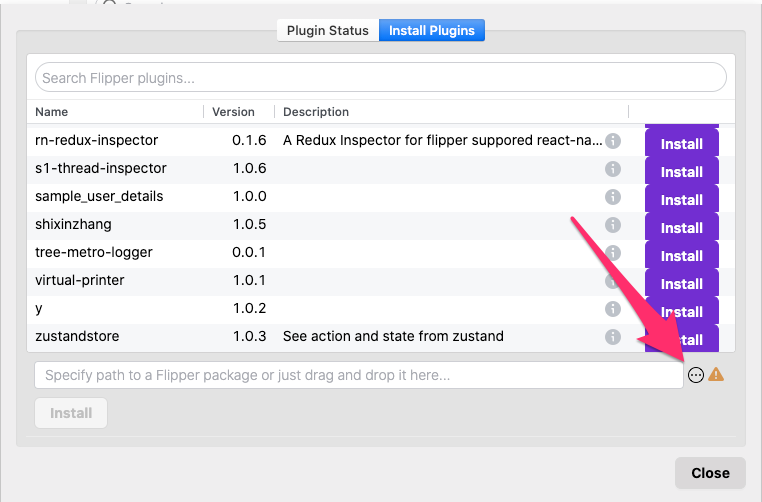
Pluginの開発者ではない人がFlipperのpathを通したり、consoleから起動する必要がないようにPluginとしてtgzファイルをExportします。
npx flipper-pkg pack を実行するとtgzファイルができます。
View -> Manager Plugins...を選択しInstall Pluginsでtgzファイルを指定すれば追加できます。
おわりに
Create Table Pluginを使ったFlipperのCustomPluginの作り方について紹介しました。CustomPluginを導入するまでは分析ログの実装確認やバグが起きた時にServer or Clientのどこに問題があるのか特定するまでに時間がかかっていましたが、原因を特定するまでのスピードが改善しました。また、AndroidエンジニアだけではなくServerエンジニアでも検証時に使える点が嬉しいです。サンプルのソースはこちらにあります。